Month: October 2025

  • Wk24 – Pig Prep

    Wk24 – Pig Prep

    With just one weekend until the piglets arrive at the farm, the weekend was primarily focused on Pig Prep. While the KuneKune pigs have a lovely temperament, they still have plenty of basic needs! Food, water, shelter, and play all need finishing off.

    This week’s round-up doesn’t include;

    • Early morning wake-ups from the bonkers kittens
    • Many hours of form-filling to get the farm registered for the pigs to arrive.
    • Hours spent trying to find a suitable stock trailer on a budget.
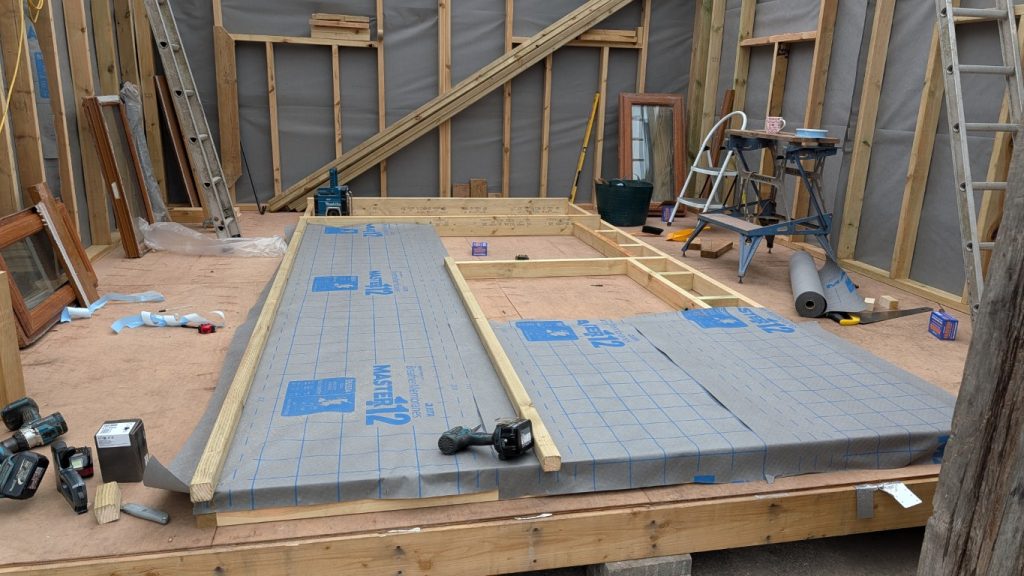
    Pig Wam

    Like so many farm-related products, shelters for pigs are an absolute minefield of options. From the very traditional pig arc made of rolled corrugated iron to modern, rather plastic solutions. All of which are rather expensive. Even a second-hand pig arc will cost £250; however, over winter, the piglets don’t need an oversized mammoth house!

    Structurally assessed to support a snow load of seven feet.
    Structurally assessed to support a snow load of seven feet.

    And to pick up the ‘DIY Farm‘ mantra, “If You Can, DIY It”.
    I’m not sure if that is especially a YouTube farmer catch line or just a rule for surviving when trying to farm! Regardless, this is a mantra I am taking to living by, and so a DIY shelter is the solution.

    House fit for a pig, entirely recycled save for some screws.
    House fit for a pig, entirely recycled save for some screws.

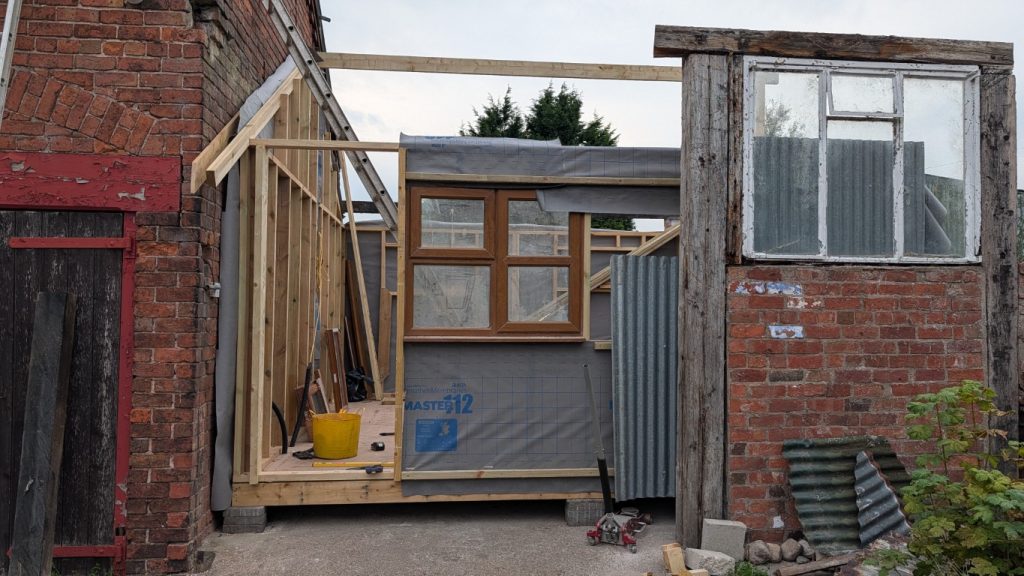
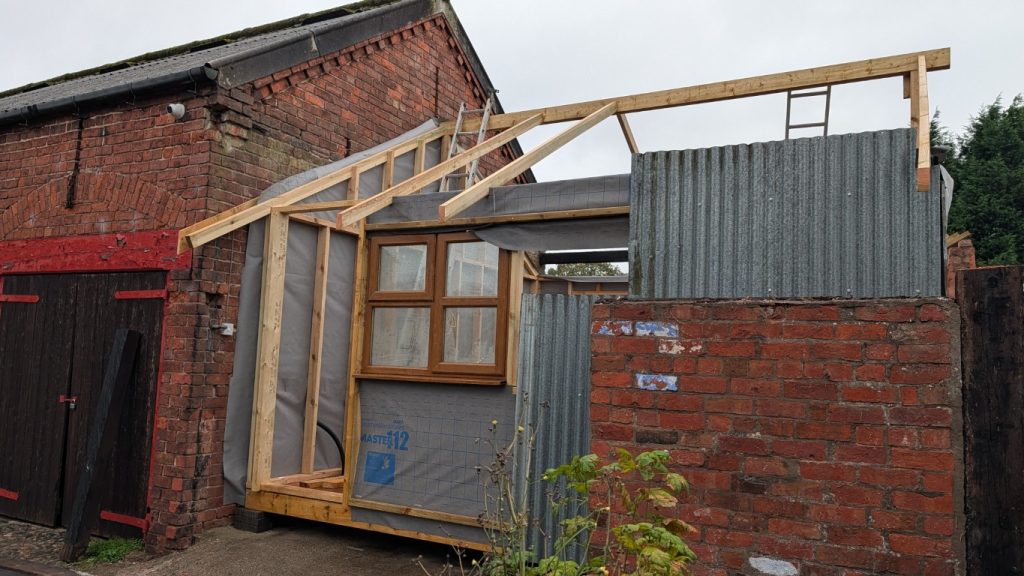
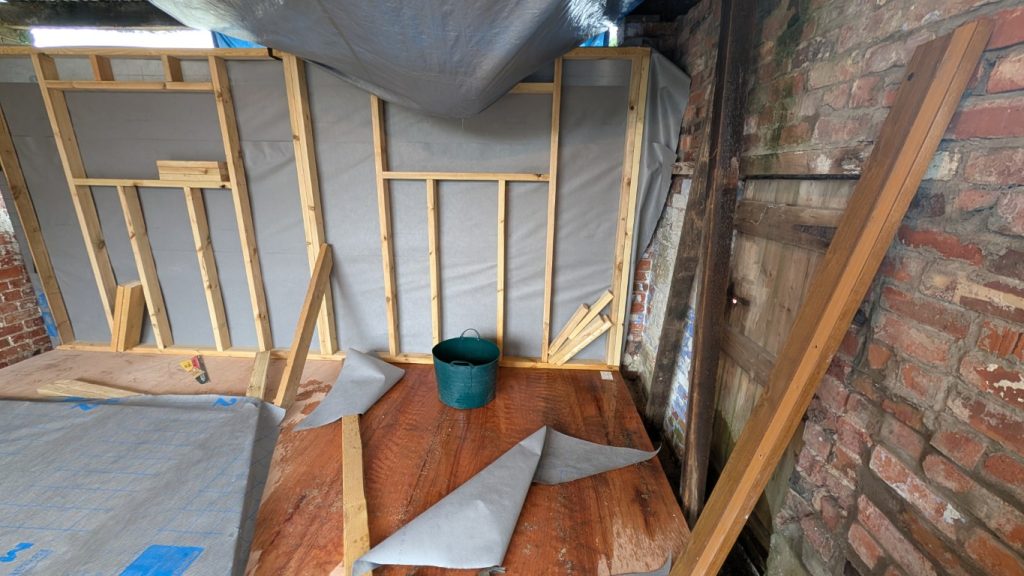
    With plenty of heavy-duty timber from an old lean-to available, the rather oversized frame was soon assembled. Having seen where the piglets currently live, building out of 3×6″ timbers is possibly overkill, but at least it won’t blow down like some other pigs houses.

    A warm, cosy space with exposed beams and plenty of natural light.
    A warm, cosy space with exposed beams and plenty of natural light.

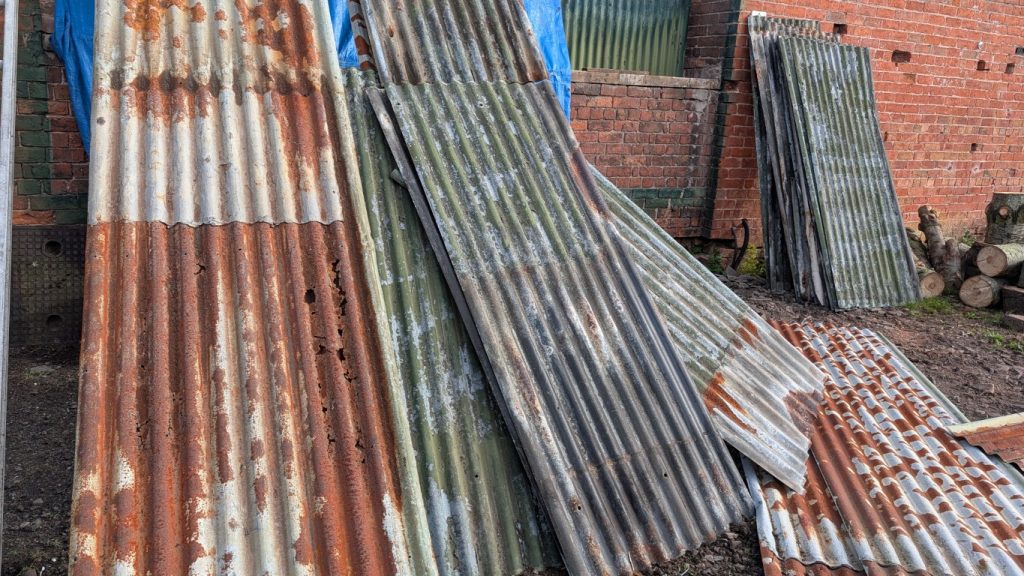
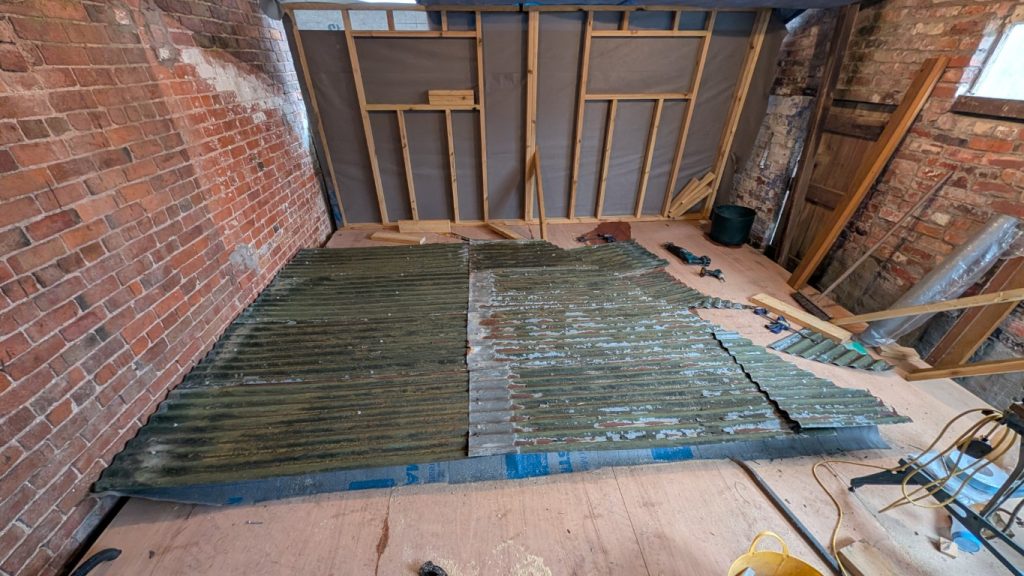
    I’ve certainly camped in worse structures. The fortune of the old carport having so many layers of corrugated sheeting means there are plenty of opportunities for reuse and reapplication.

    After weeks of calling this planned outhouse a Pig-amid, I was correctly called out by the father-in-law. As it misses a couple of hipped roof sections, this is closer to a Pig-wam. A ‘Boars-Ten‘ or ‘Porc-landic‘ might be more accurate to the shape, but a little abstract for most non-Scouting survivors.

    Pig Security

    Pig prep continued with finishing off the pig security. One thing all breeds are great at is finding alternative foraging locations.

    Fence

    After getting the stock netting installed and tensioned on the last run during the previous week, there were some finishing touches left.

    The pig prep continues by finishing off the stock fence construction.
    The pig prep continues by finishing off the stock fence construction.

    Above the stock netting, two galvanised steel wires were added. With pigs, they don’t serve much function, but as the rest of the fencing has this construction, it would look a little odd without it. Then, under the stock netting, a single line of barbed wire was laid. This should stop the pigs from rooting and getting under the stock netting.

    Electric

    With the stock hence in place, pig prep turned to something more electric. While the fencing should provide a very strong physical barrier, it is primarily a secondary boundary. An electric fence provides the primary containment. Fortunately, the pigs have been trained on an electric line, so we won’t need to teach them ourselves.

    Two lines to bind them all and in the darkness zap them.
    Two lines to bind them all and in the darkness zap them.

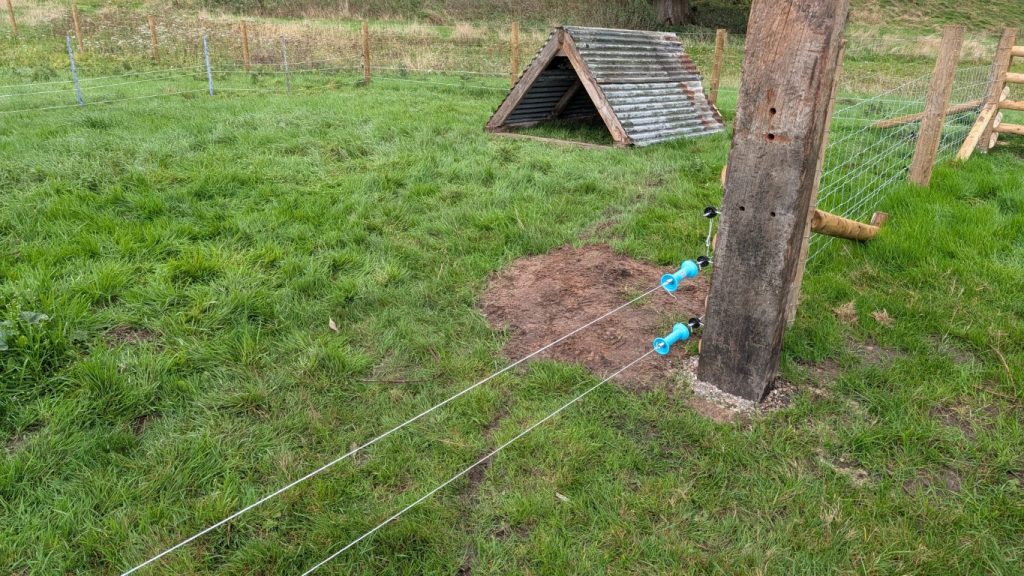
    With the help of the mother-in-law (who was very keen to be mentioned), two lines of electric fence were run around three sides of the perimeter. A combination of screw in isolators and plastic posts holds the wire off the floor, hopefully at the right height to catch the pigs’ noses and encourage them back.

    A shockingly expensive device can be powered from the mains.
    A shockingly expensive device can be powered from the mains.

    Despite looking for some six months, we’ve not been able to find a second-hand electric fence. After experiencing the baffling number of electric fence energisers that are in stock at Chelford Farm Supplies, we went with the Rutland ESD1600. Largely on cost, partly because the package had a picture of a pig on it.

    The electric fence is finished off with a warning sign, which I won't pay attention to!
    The electric fence is finished off with a warning sign, which I won’t pay attention to!

    And of course, on the ‘accessible’ side of the pig field, a nice high-visibility electric fence sign. Not technically needed, this is very much a reminder for me, ‘don’t wizz on the electric fence’ (bonus points for knowing that reference!).

    Illuminating Trip Out

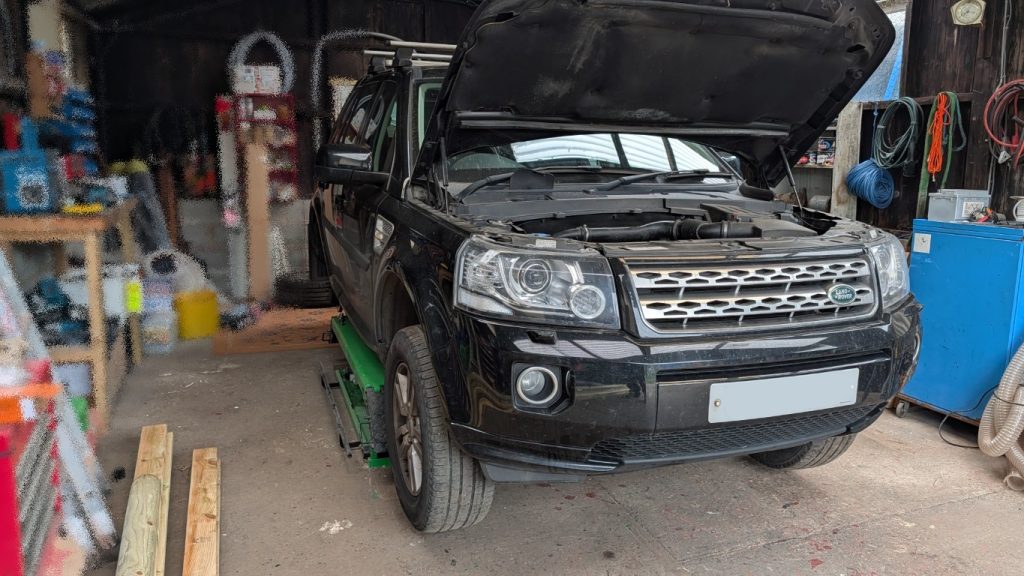
    Sunday eventually saw a rain-soaked trip to Derby for the other side of the farming. Car part farming. Thanks to the usual fun on the M6, the trip was some 30 minutes less on the way back when avoiding the god forsaken motorway.

    Car part farming continues. Just a single bulb spawned this bright harvest.
    Car part farming continues. Just a single bulb spawned this bright harvest.

    An illuminating trip for me, taking parts to a BX that’s coming back on the road and not buying any junk. Which is a technical way of saying I’d paid for them months ago. At least they’re in stock now.

    Fun Guys

    The recent wet weather has seen an explosion of fungus, fungi, fun stuff growing in the undergrowth.

    Plenty of shaggy Ink Cap mushrooms at the farm.
    Plenty of shaggy Ink Cap mushrooms at the farm.

    Even at my ripe old age, it still amazes me just how fast these eukaryotic organisms erupt out of the ground overnight. There are hundreds of them all over the farm at the moment different sizes, shapes and colours. I just need to start remembering to photograph them!


    And that’s it for this week. After spending most of the week overseas, I was a little wiped out, and progress was probably slower than I’d hoped. But we got there in the end. Pig prep is pretty much complete, bar a food trough and watering hole. Oh, and I need to choose a child to test whether the fence is working.

    Until next time
    N2F

  • Wk23 – Rafters

    Wk23 – Rafters

    While the weekend started rather well with a flurry of tasks being completed, my dream of a roof on the Megashed was soon washed out.

    Liddle Puddy Tats

    One major update I may have missed last week was the arrival of some new family members at the farm. After too many years cat-less, and months of searching, we finally made the move and nearly ended up with three cats!

    New family members arrived last weekend.
    New family members arrived last weekend.

    Welcome to the family Bonnie and Clyde, brother and sister and just 15 weeks old. Lovely temprements and really suit the names they came with so we stuck with them. They are quite the pair. Plenty of play fighting and kitten energy flying through them, especially at 5 am.

    Sleepy kittens are almost as fun as bonkers kittens.
    Sleepy kittens are almost as fun as bonkers kittens.

    And the two have quite different temprements, with Clyde clearly having no fear and seems far better at catching ground things. Bonnie is more reserved and far more interested in catching flying things. There could be some interesting years ahead with these two.

    Piglets Minus Two Weekends

    The pressure is really starting to ramp up on the piglet front. Were only a few weeks away from their arrival. While we have everything here and ready for them, there is a lot of assembly still to go.

    Last of the stock net goes up before the piglet arrival.
    Last of the stock net goes up before the piglet arrival.

    A few spare hours one evening in the week and the last of the net started to go up. However, with one end of this run being wrapped into the old cow sheds, this did have some challenges.

    A break in the weather sees the net fully tensioned.
    A break in the weather sees the net fully tensioned.

    However, by the end of the weekend, having dodged some of the down pours, the net was tensioned up. This involved a less than obvious method to secure one end of the monkey strainer, but regardless of the ‘non standard’ method, it worked.

    Farm Truck Brakes

    The farm truck has been suffering with some rather squeeky brake pads at the rear for far too long. While the rear pads aren’t overly worn, they were exceptionaly cheap, and the discs are passed best. And while I’m at it, I might was well do the fronts too.

    First 'propper' use of the scissor lift since moving to the farm.
    First ‘propper’ use of the scissor lift since moving to the farm.

    Amazingly after so many weeks living here, this is the first time i’ve had a car on the ramp. Unfortunately, it wasn’t best placed under the workshop rafters so there was a fair bit of faffing to get the ramp in the best placement.

    A little tarting up never hurt anyone.
    A little tarting up never hurt anyone.

    Despite being 12 years old, the plucky little Freelander2 isn’t looking too shabby given the less than loved life it leads. The brake shields where looking a little rough, so they got cleaned up and a dose of ‘preservative’ added.

    While still in spec, the rear discs are well worn.
    While still in spec, the rear discs are well worn.

    The image doesn’t do justise to the wear on the rear discs. They’re still in spec, but definitely at the end of their life. These Brembo discs haven’t lasted too well, but I suspect the cheap no-name pads!

    A surprise present from LR Parts.
    A surprise present from LR Parts.

    One surprise I found when unpacking the delivery from LRParts.net was this beautiful little spanner. These guys clearly know Land Rovers, with a 10mm ring at one end, and open 13mm at the other. Perfect for changing a failed battery or resetting the electrics.

    Drilled and grooved discs for added bling.
    Drilled and grooved discs for added bling.

    For the few extra pounds that they cost, I went with the grooved and drilled discs. They may help with the more heavy duty towing I’ve been doing.

    New discs all around, and the truck clearly needs a bath.
    New discs all around, and the truck clearly needs a bath.

    Rinse, repeat, and much the same on the front wheels. I guess I need to car now as it hasn’t seen soap for months. Although thats more for hiding the scratches in the bodywork.

    A Detectorist Calls

    After a chance encounter with a local lovely chat with a local metal detector waver, a few hours were spent on Friday afternoon watching a detectorist at work.

    Finds from the field are minimal but interesting.
    Finds from the field are minimal but interesting.

    Although the finds weren’t too exciting, and certainly wont make me a millionare, it was interesting to see some lost treasure. Most of the finds where in the same area, so we might have to have another route around when the grass is cut.

    Surface Water Sump Update

    After some trees where removed in September, we found an interesting buried structure. This surface water sump, into which all the surface drain run, was some what full with all the organic matter that had washed through the drain system.

    Clearing out the sump has been a lengthy task.
    Clearing out the sump has been a lengthy task.

    I can only speculate at how long it is since this catch tank was last evacuated. With hind sight, I probably should have had it vacuum out when the septic tank was cleared. Unfortunately, the upper sections are too frail to use the minidigger, so the only solution was manual excavation.

    The sump is cleared and should manage a few more years now.
    The sump is cleared and should manage a few more years now.

    After months of digging out the sump during dry-ish spells, I’m happy to finally call the chamber clear. The brick structure was a lot deeper than expected. Getting down to nearly 5ft, I’m hoping it won’t need emptying for a while!

    Megashed Updates

    Up with the walls.

    In semi-desperation of getting ahead of the weather, I rather threw myself into the megashed, and as a result didn’t get a lot of pictures.

    You know the drill. Frame, wrap, clad, lift.
    You know the drill. Frame, wrap, clad, lift.

    The last of the apex sections where swiftly thrown together, clad and raised. A minor step but this meant practically three walls where now complete-ish.

    Big. Really big. Too big?
    Big. Really big. Too big?

    With the wall panel raised, the scale of the ‘office’ was becoming quite challenging. It is HUGE. Far bigger than I had imagined. Sufficiently large enough that more than a few observers have asked when the mezzanine is being errected.

    Front Wall

    Battling on, and desperately trying to win the race with the clouds, and the front wall frame started to go together. I was expecting this to be the most complicated of all the walls.

    The front frame is nearly ready to complete the walls.
    The front frame is nearly ready to complete the walls.

    However, despite having a door, two windows and a different cladding finish the frame came together rather quickly. The 8ft, rather than 7ft, cladding panels did leave a little head scratching to best place them.

    The first of six windows is installed.
    The first of six windows is installed.

    After an old friend accidentally stopped by, and was supplied sufficient ibuprofen, we managed to carefully lift the front wall into place. A little trolley jack assistance went a very long way.

    Roof Rafters

    An early Sunday start began with mass production of the roof rafters, including the birds mouth that would sit on the top of the wall.

    Mass production of rafters front and rear.
    Mass production of rafters front and rear.

    Mark, cut, repeat is a great game to play. So long as I remember to mark the rafters up as front and rear are ever so slightly different.

    Four rafter raised until disaster befell the building..
    Four rafter raised until disaster befell the building..

    And, of course, as soon as I raised the first rafter, the weather broke. I battled on in the wind and rain and managed a few more of the front rafters. Then I had the idea to put a tarp over the back half of the shed. This, it would turn out, was a terrible idea. The tarp acted like a sail and blew the ridge beam out of position.

    After the window came down, the ridge beam could be relocated.
    After the window came down, the ridge beam could be relocated.

    In the end, the tarp came off, and in a break in the weather, I managed to get the ridge beam back into position. With a front and rear midspan rafter in place, the ridge beam was at least now stabilised.

    Unfortunately, to get the rafter furthest from the door installed, the old cast steel window had to come out, which was quite the event. A chainsaw and optimism saw the supporting beam shorn, after the window had been prised out for another project.

    Until next time
    N2F

  • Wk22 – Walls

    Wk22 – Walls

    This week, I have mostly been knocking down, constructing and putting up walls for the Megashed2.0. After last week’s disappointing weather, there was a concerted effort to try to get back on track!

    Things not covered in this week’s blog;

    • An overly long trip out for electric fence supplies
    • The starting holes of another fence collection
    • And the departure of many bags of wood chips

    De-roofing

    Up until now, I have been building the Megashed2.0 under the roof of an old carport. This has had mixed blessings. While the roof has kept some of the weather out, there are areas where it is pretending to be a colander.

    I suspect it is a long time since the top of these rafters where last seen.
    I suspect it is a long time since the top of these rafters where last seen.

    The near continuous wrestling with a tarp, intended to divert torrents away from my head, has not been in any way successful. With a drive on to raise one of the gable ends, it was time for the old carport roof to come down.

    Many layers of the roof sheet are slowly removed.
    Many layers of the roof sheet are slowly removed.

    While on the surface the old tin work looks past its best, don’t let the orange patina fool you. For reasons best known to the installer, there are three layers of sheeting on the roof, with the lowest layer in the best condition.

    A depression in the sheet metal has been pooling water.
    A depression in the sheet metal has been pooling water.

    While it is a little hard to see through a camera, the reason for my never-ending plastic sheet battles became quite clear from above. With one of the rafters having turned to ‘fluff’, the metal sheets have bowed, trapping water and worsening the failure.

    Roof sheet removal.

    A combination of angle grinder, hammer, crow bar and swearing was all employed to release the roof cladding from its restraints. Despite the rather ‘weak’ appearance of the structure, some of the fixings were reluctant to leave their homes.

    More corrugated sheets than I know what to do with.
    More corrugated sheets than I know what to do with.

    After not too many hours on Friday, the carport roof was razed to the ground. And the majority of the three layers of five-square-metre roof tin is perfectly reusable.

    Rafter Removal

    After some measuring, head scratching, and tea drinking, it became apparent that one of the ‘not so attached any more’ rafters would need to be brought down.

    The view of the sky is getting better as the rafters fall.
    The view of the sky is getting better as the rafters fall.

    In principle, this was rather straightforward, with gravity being on my side. However, having a complete wall section on the ground below the rafter added an extra ‘fun’ challenge.

    Forty years without a scratch, until now.
    Forty years without a scratch, until now.

    While the ‘slide-it-down-the-ladder’ method was, in principle, a success, there were some fatalities. Excess gravity, coupled with someone having a little panic, led to the near-death of a ladder rung or two. Fortunately, despite this major damage, I can confirm this forty-something-year-old ladder/family airloom has recovered and returned to work.

    Reworking the gable wall

    Last week ended with the creation of one of the gable end wall sections. And while bringing down the ‘house’, so to speak, I realised I’d made a rather significant balls up

    If only I had remembered which wall the rafters sit on.
    If only I had remembered which wall the rafters sit on.

    The rafter will sit on the outside walls, and not the gable end wall. Obvious when you realise, and fortunately, I hadn’t gotten it up yet, or I might have been stuck in a half-mast condition.

    The wall is ready for rising, but night has fallen.
    The wall is ready for rising, but night has fallen.

    Correcting the mistake meant spending the Friday evening taking half the sodding wall apart, recutting the rafter, and reassembling everything.

    Practically working by candlelight.
    Practically working by candlelight.

    Fortunately, the outdoor and indoor lights were still operational, allowing me to extend the working day by a few hours.

    Fixings from the roof are collected with a magnet, before a tyre finds them.
    Fixings from the roof are collected with a magnet, before a tyre finds them.

    However, with guests due the following day, there was one job that needed to be completed before going to bed. Helped by the children (during daylight), I now needed to find all of the previously removed roof fixings! Just a wheelbarrow’s worth, nothing to see here.

    Production Line Walls

    Bright and early Saturday morning, I was off into the workshop for a big tidy-up and some prefabrication. Dragging the chop saw in and out every night was getting tiring, so it was good to set up a workstation inside.

    Production line speeds up wall construction.
    Production line speeds up wall construction.

    As the build is relatively simple, much of the wall timber could be cut up and ready for assembly at a more socially appealing time.

    Raising the high panel

    While Saturday was more a day of shopping than action, an unexpected visitor helped make great progress in the afternoon.

    As the walls go up, the scale is becoming apparent.
    As the walls go up, the scale is becoming apparent.

    With the remaining rafters dragged out of the wall and disposed of, there was plenty of room to raise the wall section that had been lying around for the past week. Lifting the rafter over the end wall nearly killed me, but the operation was rather satisfying when the pieces locked into place

    Speed Building

    Sunday morning, and I was keen to make up for the slack Saturday. Straight on to the pile of pre-cut timber, and the first of the opposing gable walls could be assembled.

    Framing. Boring. Nearly over.
    Framing. Boring. Nearly over.

    As I can access everything over two meters once this wall is in place, the rafter and final cladding could be installed later. I’ve rather debated about using such small windows on what is arguably the best potential view from the Megashed 2.0, but they are what the budget allows for right now.

    One of the half-clad walls is ready for raising.
    One of the half-clad walls is ready for raising.

    By only half-cladding the wall, I could save some time and possibly my spine. Those metal sheets don’t weigh much on their own, but they soon add up.

    The ups and downs of walls

    With the wall ready for a vertical voyage, I realised there might be an extra step needed. The new building sits inside a brick surround. A mixture of old pig sty, extension and bodgery.

    While it looks like it should just fall off, the upper wall was stuck fast.
    While it looks like it should just fall off, the upper wall was stuck fast.

    I love the ‘just add a few more bricks’ look of the wall; however, some elements aren’t as structurally sound as they once were. Despite deploying a nine-inch grinder, sledgehammer, and various levers, the wall was harder to bring down than expected.

    I've no idea how it got there; it just fell off.
    I’ve no idea how it got there; it just fell off.

    At some point, the upper section had been repointed, or laid with 99% concrete mortar and was very solid. The lower half of the wall was once lime pointed and was more interested in coming down. In the end, the upper section came down as a single piece, without bringing down the lower section. Phew.

    Ridge Beam Installation

    With the old brick wall reduced in height to something more usable for looking out over, the wall panel could finally be positioned.

    With the brick wall shrunk down, the half-clad wall can be installed.
    With the brick wall shrunk down, the half-clad wall can be installed.

    Being half-clad, this was the easiest wall to position so far. However, it did take a little shuffling to get both walls plumb and true. Nothing a tap from my little hammer couldn’t cure.

    With half the walls built, the building's scale is becoming clear.
    With half the walls built, the building’s scale is becoming clear.

    One full wall and two half walls might not be a complete building by any stretch, but for me, this is a huge milestone. Almost halfway through the construction of the walls feels like great progress.

    The ridge beam is raised up and onto the ridge beam supports.
    The ridge beam is raised up and onto the ridge beam supports.

    Having ridge beam supports at either end of the roof span also means I can raise the first half of the ridge beam. A temporary installation at this stage will provide the wall with some support in case the weather changes. The ridge beam will also aid in installing the rafters.

    A Complete Gable

    Encouraged by the fantastic morning progress, after lunch, I pressed on with building the other half of the gable wall.

    Measure nonce, cut twice. I wish I had built more walls before cutting this rafter.
    Measure nonce, cut twice. I wish I had built more walls before cutting this rafter.

    Amazingly, I made the same mistake again on the rafter, forgetting that it would sit on the outer wall, which isn’t yet built. Doh!

    Rapid progress on the walls meant no time for building pictures.
    Rapid progress on the walls meant no time for building pictures.

    In a bit of a battle against the rapidly approaching dusk, I completely failed to take any mid-build pictures. However, I’m sure by now you can use a little imagination to guess how it went together.

    The complete gable wall makes me question my dimensions!
    The complete gable wall makes me question my dimensions!

    With a little help from the other farm workers, the second half of the gable wall was lifted over the ducts and dropped gently into place. No force required, and definitely no ‘interesting’ moments while taking out one of the final rafters.

    And that wraps up the week. Something of a weekend of graft, but some significant progress nonetheless. I certainly feel like I’ve caught up from Storm Amy. The weather looks fairly mild next week, so maybe I can finish the walls.

    Until next time
    N2F

  • Wk21 – All a bit blowy

    Wk21 – All a bit blowy

    This week has been a bit of a bust with Storm Amy blowing through the UK. While the rain has been largely manageable, the near-constant wind isn’t great for roofing work! I wish I had checked the weather forecast before I started taking the old shed roof apart.

    Things not covered in this article;

    • The workshop’s backdoor ‘barricade’ was removed.
    • The logs of most of the trees were taken away.
    • The BX bumper art installation was dismantled.
    • Supplies for the drainage project arrived.

    Windfall

    One upside to the never-ending onslaught of airborne turbulence is the reduced effort required to gather apples. While we are unfortunately down to four trees, this year has been a bumper harvest!

    Apples are far easier to collect after a windy weekend.
    Apples are far easier to collect after a windy weekend.

    We’re taking in a huge bucket load every day, but there is a limit to how much crumble I can manage. I’ve not found the limit yet, but there definitely will be one as I rapidly turn into a teletubby

    Megashed 2.0

    The construction of the Megashed continued, but the weather quickly halted progress. I’m not sure how I’ll recover from this largely lost weekend. While I started with good intentions and began taking roof sheets off, having a whole panel blown out of my hands made me reconsider my options.

    The escaped wall is relocated back onto the Megashed base.
    The escaped wall is relocated back onto the Megashed base.

    While the weekend wasn’t too wet, I did spend a lot of time chasing puddles from a leaky roof. The wind also blew last week’s wall out of position, which took a little bit of lateral thinking to get it back into its location.

    The DIY wall starts to take shape.
    The DIY wall starts to take shape.

    Another ‘Ikea’ wall was cut to size, and a lot of decisions were made on the roof design. This panel will serve as the blueprint for the entire roof. Like the previous Megashed, this one will be a ridge beam construction.

    The framed wall is dressed to impress.
    The framed wall is dressed to impress.

    Like the previous wall, the frame was securely in place, and the breather membrane was stretched over the top. Making the gable end panels in sections will be slower, but I can’t easily lift the full panel when it is clad.

    Too much water for the makeshift canopy.
    Too much water for the makeshift canopy.

    And just as it seemed to be going so well, I started to get a wet tap on the head, and looked up! Oh, that’s a big puddle in the tarpaulin.

    Recycled cladding has its challenges.
    Recycled cladding has its challenges.

    With the frame assembled and dressed, and with the puddle cleared, the cladding could be brought in. Recycling the old shed roof presents some additional challenges. With bonus bends, some rust and rather short lengths, there is a lot to balance.

    Unfortunately, as the weather started to pick up, installing the wall section was simply not possible. While it was only a two-person lift, no plant required, the wall is too tall for the old shed roof, which will need to come down. The weather, however, had other ideas, blowing a roofing sheet clean out of my hands after I was freed from the roof.

    Mini Digger Track Service

    The ‘downtime’ from the MegaShed build, due to the high winds, did allow some catching up on maintenance jobs. While collecting some drainage supplies, I happened past a branch of John Bownes and picked up some track oil.

    Changing the mini digger track motor oil was surprisingly straightforward.
    Changing the mini digger track motor oil was surprisingly straightforward.

    I expected a bit of a fight to get the drain and fill plugs open, but all four were undone easily. Getting the oil out was a little more difficult. Lifting the tracks up on one side certainly helped.

    JCB 8015 track motors were over due an oil change.
    JCB 8015 track motors were overdue for an oil change.

    The sludge that slowly oozed out was certainly well overdue for a change. The mini digger came with no service history, but the dark grey gloop that came out suggests the track motor oil may never have been changed.

    Lights On

    Another ‘hiding from the weather’ activity was a spot of work on the ride-on mower. While the mower is a relatively old and basic model, it does have some ‘headlights’. I’d previously checked the bulbs, and they were fine, so some electrical diagnostics were needed.

    Repairing the Castle Garden mowers' lights was simple.
    Repairing the Castle Garden mowers’ lights was simple.

    After extracting the light switch from the dash, it became apparent that the issue was with the switch itself. Ignition supplied to one side of the switch wasn’t making it through the contacts. In the end, the switch had half a field removed within the body, and started to work just fine.

    As a bonus step, the huge amount of red overspray was removed from the headlights. They might not be the brightest, but they should be better than nothing.

    Mini digger repairs

    Back to the mini digger, and there was plenty of work to be done. This JCB 8015 appears to have been used as plant hire at some point, and bears the scars to prove it.

    Cylinder Protectors

    Both the boom cylinder and the doser cylinder should have a big metal plate to protect the ram and pipes. While the boom protector is completely missing, the steel plate around the doser cylinder was barely holding in.

    JCB 8015 doser guard works much better with two straight bolts.
    JCB 8015 doser guard works much better with two straight bolts.

    Two rethreaded M10 holes in the cylinder bosses, coupled with some new bolts and washers, soon improved the situation. Now that the plate was securely fixed, it might offer some protection.

    Providing some illumination

    As the nights draw in, I’m finding that I’m bringing back the digger in the dark far more often. There isn’t much illumination on the farm, so vehicles require their own lights if they’re being used after dusk.

    These 'Willpower' LED lights are becoming my go-to.
    These ‘Willpower’ LED lights are becoming my go-to.

    The JCB 801 should have come with factory-installed lights; however, they have been lost on this digger for some time. Fortunately, I managed to trace the original cut of wires, making the electrical connection straightforward.

    The JCB 8015 mini digger's work light is illuminated again.
    The JCB 8015 mini digger’s work light is illuminated again.

    Another poor operating switch was cleaned up, and blamo, working lights! For me, this is quite a quick turnaround; the new LED lights had only been on a shelf for four weeks. Definitely a record for me.

    Cleaning Up

    A slightly drier Sunday meant some more heavy work could be completed. For weeks, I’ve been scraping up piles of rubble, dirt and overgrown land which needed some serious tidying up.

    Digger and bucket cleaning up.
    The digger and bucket are cleaning up.

    Moving piles of materials is far easier with two people, one operating the excavator and the other operating the loader shovel. A brief moment allowed us to team up and relocate the excess mounds to the bottom yard, out of the way for now.

    And that’s it for this weekend. Poor weather didn’t completely stop work, but it has certainly put me behind on the Megashed. I’m not sure how I’ll catch up, but with the roof design being set, the rest of the apex wall should be a little quicker to assemble.

    Until next time
    N2F