

This week, I have mostly been knocking down, constructing and putting up walls for the Megashed2.0. After last week’s disappointing weather, there was a concerted effort to try to get back on track!
Things not covered in this week’s blog;
- An overly long trip out for electric fence supplies
- The starting holes of another fence collection
- And the departure of many bags of wood chips
De-roofing
Up until now, I have been building the Megashed2.0 under the roof of an old carport. This has had mixed blessings. While the roof has kept some of the weather out, there are areas where it is pretending to be a colander.

The near continuous wrestling with a tarp, intended to divert torrents away from my head, has not been in any way successful. With a drive on to raise one of the gable ends, it was time for the old carport roof to come down.

While on the surface the old tin work looks past its best, don’t let the orange patina fool you. For reasons best known to the installer, there are three layers of sheeting on the roof, with the lowest layer in the best condition.

While it is a little hard to see through a camera, the reason for my never-ending plastic sheet battles became quite clear from above. With one of the rafters having turned to ‘fluff’, the metal sheets have bowed, trapping water and worsening the failure.
Roof sheet removal.
A combination of angle grinder, hammer, crow bar and swearing was all employed to release the roof cladding from its restraints. Despite the rather ‘weak’ appearance of the structure, some of the fixings were reluctant to leave their homes.
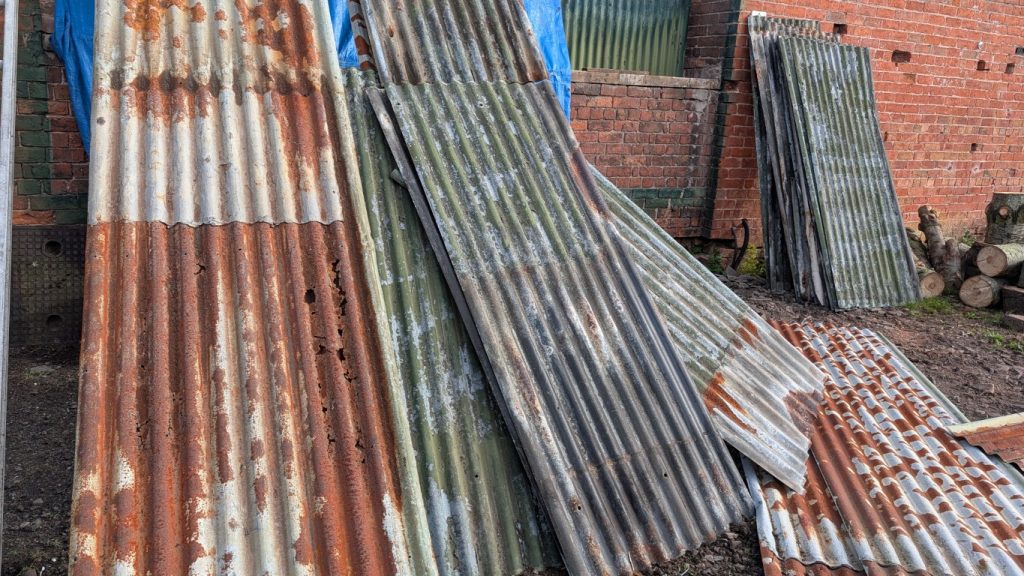
After not too many hours on Friday, the carport roof was razed to the ground. And the majority of the three layers of five-square-metre roof tin is perfectly reusable.
Rafter Removal
After some measuring, head scratching, and tea drinking, it became apparent that one of the ‘not so attached any more’ rafters would need to be brought down.
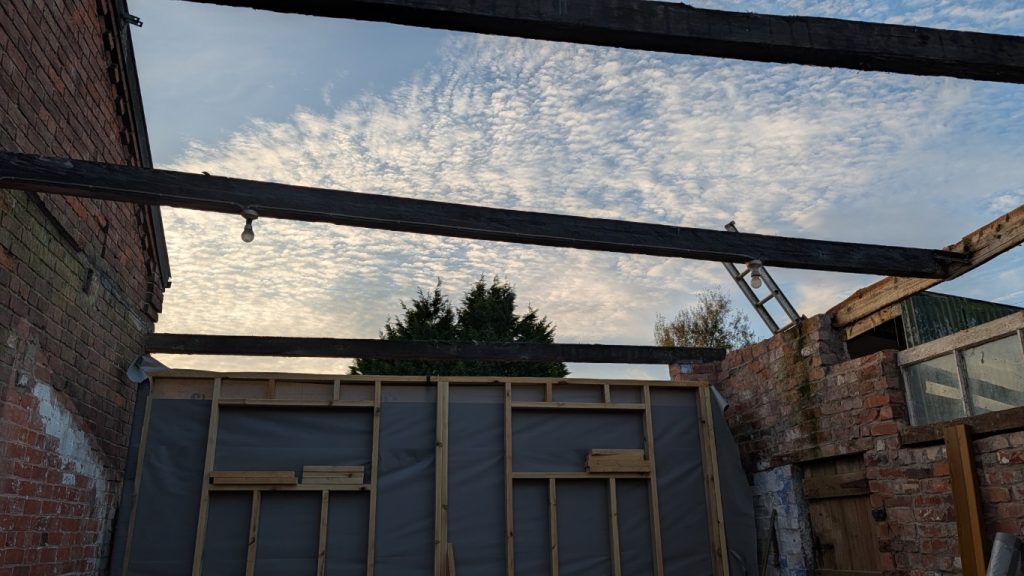
In principle, this was rather straightforward, with gravity being on my side. However, having a complete wall section on the ground below the rafter added an extra ‘fun’ challenge.
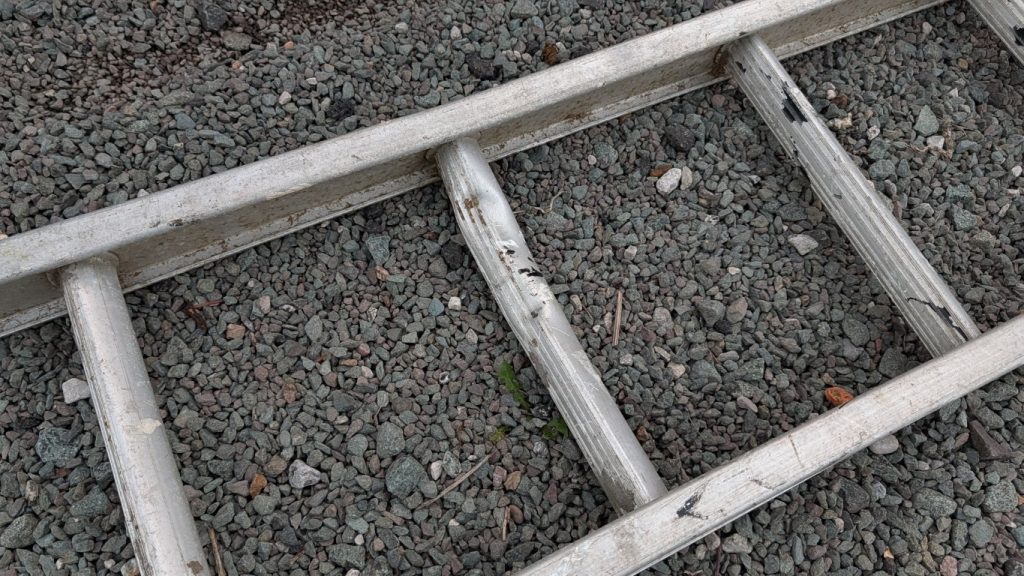
While the ‘slide-it-down-the-ladder’ method was, in principle, a success, there were some fatalities. Excess gravity, coupled with someone having a little panic, led to the near-death of a ladder rung or two. Fortunately, despite this major damage, I can confirm this forty-something-year-old ladder/family airloom has recovered and returned to work.
Reworking the gable wall
Last week ended with the creation of one of the gable end wall sections. And while bringing down the ‘house’, so to speak, I realised I’d made a rather significant balls up

The rafter will sit on the outside walls, and not the gable end wall. Obvious when you realise, and fortunately, I hadn’t gotten it up yet, or I might have been stuck in a half-mast condition.

Correcting the mistake meant spending the Friday evening taking half the sodding wall apart, recutting the rafter, and reassembling everything.

Fortunately, the outdoor and indoor lights were still operational, allowing me to extend the working day by a few hours.

However, with guests due the following day, there was one job that needed to be completed before going to bed. Helped by the children (during daylight), I now needed to find all of the previously removed roof fixings! Just a wheelbarrow’s worth, nothing to see here.
Production Line Walls
Bright and early Saturday morning, I was off into the workshop for a big tidy-up and some prefabrication. Dragging the chop saw in and out every night was getting tiring, so it was good to set up a workstation inside.

As the build is relatively simple, much of the wall timber could be cut up and ready for assembly at a more socially appealing time.
Raising the high panel
While Saturday was more a day of shopping than action, an unexpected visitor helped make great progress in the afternoon.

With the remaining rafters dragged out of the wall and disposed of, there was plenty of room to raise the wall section that had been lying around for the past week. Lifting the rafter over the end wall nearly killed me, but the operation was rather satisfying when the pieces locked into place
Speed Building
Sunday morning, and I was keen to make up for the slack Saturday. Straight on to the pile of pre-cut timber, and the first of the opposing gable walls could be assembled.

As I can access everything over two meters once this wall is in place, the rafter and final cladding could be installed later. I’ve rather debated about using such small windows on what is arguably the best potential view from the Megashed 2.0, but they are what the budget allows for right now.

By only half-cladding the wall, I could save some time and possibly my spine. Those metal sheets don’t weigh much on their own, but they soon add up.
The ups and downs of walls
With the wall ready for a vertical voyage, I realised there might be an extra step needed. The new building sits inside a brick surround. A mixture of old pig sty, extension and bodgery.

I love the ‘just add a few more bricks’ look of the wall; however, some elements aren’t as structurally sound as they once were. Despite deploying a nine-inch grinder, sledgehammer, and various levers, the wall was harder to bring down than expected.

At some point, the upper section had been repointed, or laid with 99% concrete mortar and was very solid. The lower half of the wall was once lime pointed and was more interested in coming down. In the end, the upper section came down as a single piece, without bringing down the lower section. Phew.
Ridge Beam Installation
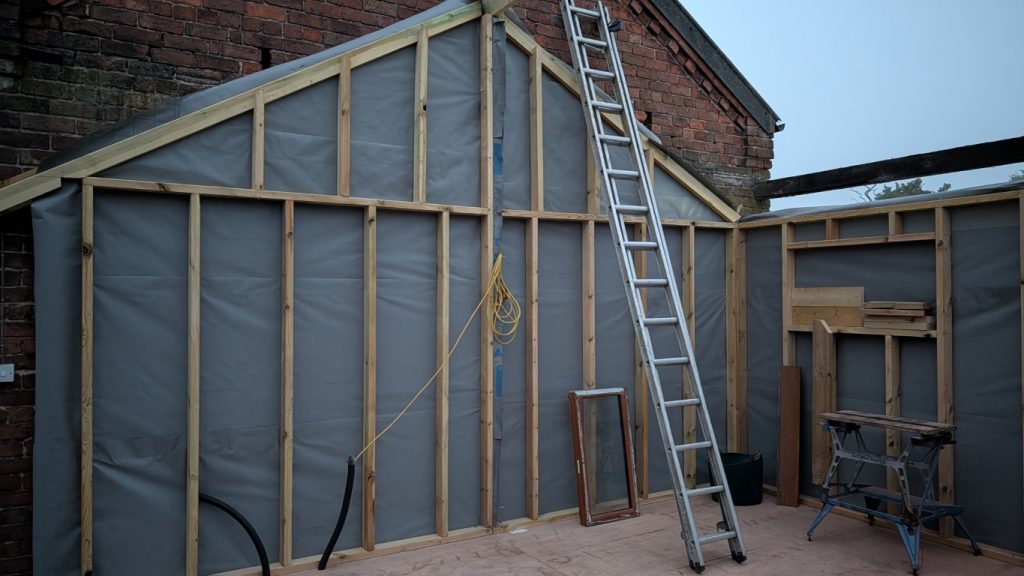
With the old brick wall reduced in height to something more usable for looking out over, the wall panel could finally be positioned.

Being half-clad, this was the easiest wall to position so far. However, it did take a little shuffling to get both walls plumb and true. Nothing a tap from my little hammer couldn’t cure.

One full wall and two half walls might not be a complete building by any stretch, but for me, this is a huge milestone. Almost halfway through the construction of the walls feels like great progress.

Having ridge beam supports at either end of the roof span also means I can raise the first half of the ridge beam. A temporary installation at this stage will provide the wall with some support in case the weather changes. The ridge beam will also aid in installing the rafters.
A Complete Gable
Encouraged by the fantastic morning progress, after lunch, I pressed on with building the other half of the gable wall.

Amazingly, I made the same mistake again on the rafter, forgetting that it would sit on the outer wall, which isn’t yet built. Doh!

In a bit of a battle against the rapidly approaching dusk, I completely failed to take any mid-build pictures. However, I’m sure by now you can use a little imagination to guess how it went together.
With a little help from the other farm workers, the second half of the gable wall was lifted over the ducts and dropped gently into place. No force required, and definitely no ‘interesting’ moments while taking out one of the final rafters.
And that wraps up the week. Something of a weekend of graft, but some significant progress nonetheless. I certainly feel like I’ve caught up from Storm Amy. The weather looks fairly mild next week, so maybe I can finish the walls.
Until next time
N2F